
My Move from Drupal to GitHub Pages
This post will try to walk through the steps I went through to move from a hosted Drupal 7 blog to this current GitHub Pages blog. It took me about 3 days to complete, but would take almost no time if you were a Linux user with a solid grasp of GitHub. The bonus is that, besides the ease of use GH Pages provides over Drupal (or other CMSes like WordPress), it taught me a lot of the basics of GitHub. Which is nice.
So far, GitHub Pages has a lot going for it. There’s no database to worry about (sidesteps issues in security, complexity, and portability). It’s free. I have complete access to it, which is nice because when I paid for hosting, my hosting provider would randomly turn off SSH access or things like that.
Then there’s the benefits of not using a CMS. Now, I’m glad I know how to use Drupal and WordPress, but for one person, it’s just time-consuming and pointless. A CMS is pretty easy to set up, but soon you are scouring, downloading, and keeping up-to-date dozens of extensions, themes, etc. Even the WYSIWYG nature of creating posts is much more time-consuming than you would expect. That combined with the fact you don’t really have access to the underlying HTML means it limits what I wanted to do, in terms of metadata. I simply can’t do that as a metadata professional! I will miss being able to try out Drupal 8, though.
###Step 1: Fail My inital attempt was mixed, but filled with fail. It started pretty easily. For GitHub Pages, all you do is create a repository, only you must use the proper naming convention, which is: yourusername.github.io Now, your’re not tied to that being your domain name if you think that looks tacky. You can simply create a file called CNAME in your repository, that has the domain name you own.
At this point, you have it set up. This might take minutes, but it could take a while if you’ve never used GitHub, because there’s a lot of configuration and workflow things you’ll have to set up before you get to the ‘create a repository’ stage. I had previous experience with GitHub on Linux, so moving to GitHub for Windows took a while. It’s mostly because things are fragmented. Often I have to use the GitHub for Windows program, use Git Shell for specific things that aren’t easy to do with the program, and make sure things sync to the GitHub. There’s no real way to stay on the command line, although I know people who do that on Windows.
Which brings us to Jekyll. Jekyll is awesome, but unfortunately, Windows is not really supported. I still got it to work, sorta, but it was a nightmare. Certain pieces of the software (specifically, Ruby gems) have to be held back, and when you look at a lot of great resources about Jekyll, you can’t just assume that is what you can accomplish on Windows. It removes one of my favorite aspects of open source software, that I can just Google something super quick and copy and paste to get things done. So, instead of the wonderful “run these 3 lines of code in your shell and you’re done!”, I had to go through three different multi-page tutorials, some of which basically said “This will probably work, but it might not.”
I did eventually get Jekyll to build pages, but incoporating cool stuff like Bootstrap and things like that was nearly impossible. I could have gone pure Octopress and ignored Jekyll, but that didn’t really suit my needs, since I don’t blog a lot about code. I still wanted Jekyll because it’s tightly integrated with GitHub Pages.
###Step 2: Success I blew up my repository (again) and started over, this time just serving static HTML files. But of course, I don’t know CSS very well, and wasn’t about to spend hours just getting the basics. And as stated above, Bootstrap was just not working for me. Just when I was about to give up, I started looking into Windows-specific implementations of Jekyll. I tried many, but was very unsatisfied. Then I came across Jekyll Now, which solved my problems. All I had to do was delete everything, fork it to my GitHub Pages repository, and voila. I now had a basic ‘Hello World’ type page, but that actually looked pretty good, since a lot of work had been already done with theming and CSS. And I still have Jekyll installed correctly locally, so I can still get things done through Jekyll commands, get additional Ruby gems for added functionality, etc.
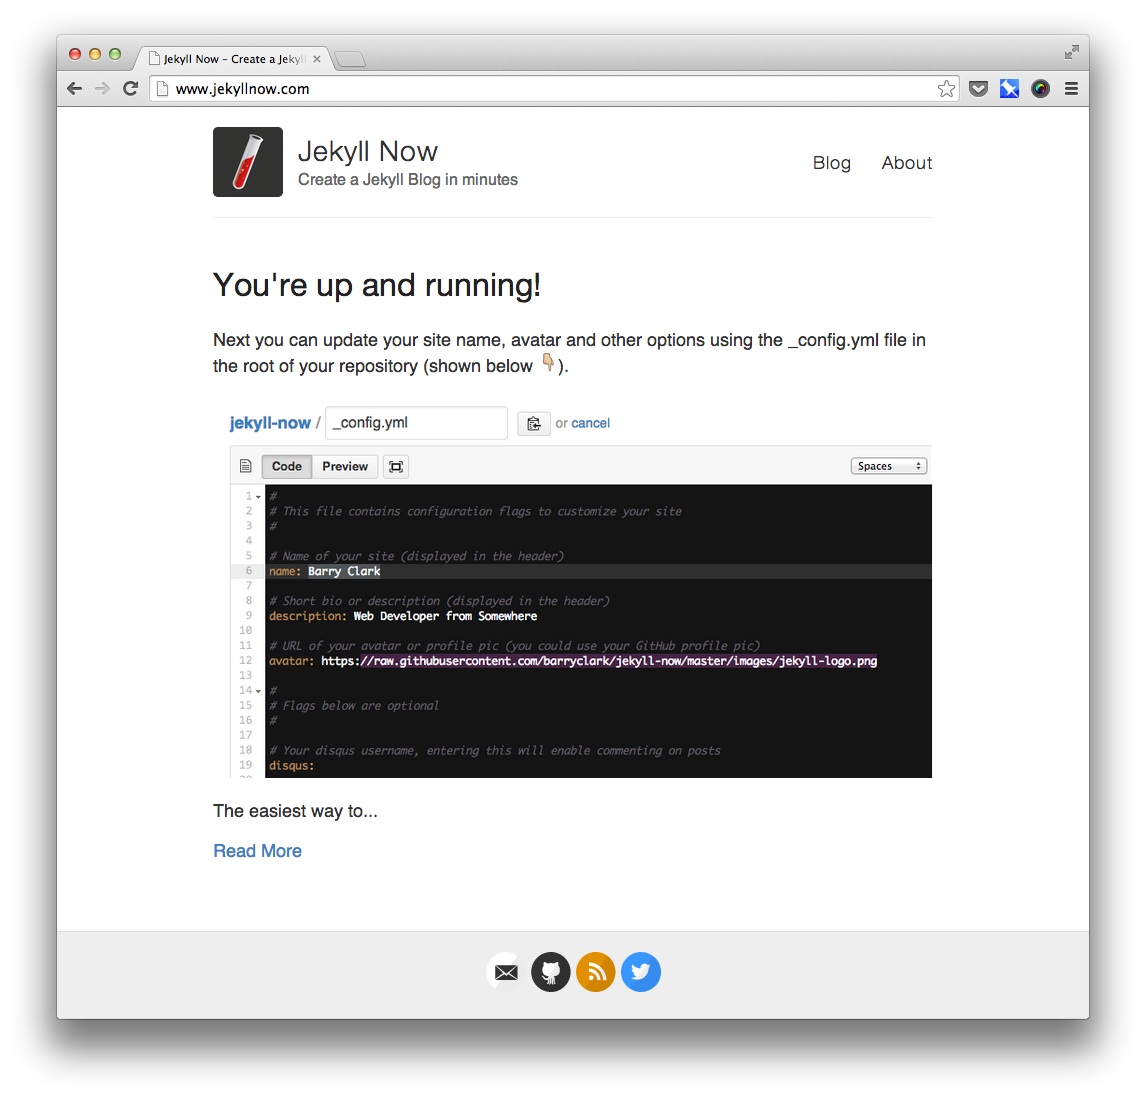
###Step 3: Tinkering So now that I had the basic page up, it was all about adjustments. What’s not immediately intuitive is that GitHub Pages w/ Jekyll doesn’t really just expect you to go into your index.html and make adjustments there. Things are a bit more modular, with templates that dictate things. And you likely need to edit the _config.yml file for a lot of your global site settings. Suffice it to say, you have to figure out where to make changes first.
So I dove right into that _config.yml. Since I had forked the repository from someone else, that meant he had a lot of his information in the configuration file, like his GitHub username, a URL to that specific site, the site’s displayed description, links to his social accounts, etc. Once those were replaced, things looked pretty similar to my existing Drupal 7 site, which had the Bootstrap theme installed.
Replacing the default Jekyll image with my personal image was simple, adding it to the root of the repository and pointing to it in _config.yml. Next, I set up my Disqus administration information on their website, so that I could have simple commenting functionality. I don’t like Disqus very much, but it’s pretty much the standard right now. The I edited both index.html and default.html, so that I could change the default length of post previews, and add more links in the above navbar. Then I edited my About page and the default.html page, adding schema.org markup where possible. Hopefully, once the site is crawled, that structured data will show up.
For the future, all I have to do is create my resume and portfolio pages. Like I said, I miss not being able to mess around in Drush and am sad I won’t get to play with Drupal 8, but I am so happy I can just throw a post together in Markdown and push it to my site.